How To Fasten A Tinkle Trap Prefitted
So you're about to place an order for Tinkle Traps prefolds-converted-to-fitteds? And you're thinking you might like snaps or Aplix (velcro) closures? Here I'm going to show you why you'll like no-closure Tinkle Traps so much more! If you choose to have the prefold rise trimmed, you'll have a trimmer fit. But if you leave the length of the prefold, you can fold down the excess and they should fit well into Toddlerhood.
Here to demonstrate is our dolly Meaghan. And my assistant Kellie will be pointing out the important parts to remember.
Step 1: Locate a Tinkle Trap and a Snappi
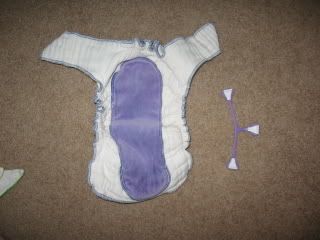
Step 2: Lay baby in Tinkle Trap

Step 3: Pull up the front.
 ]
]
Step 4: Pull one wing snug across baby's belly.

Step 5: Pull other wing snug across baby's belly. Hold secure with hand.

Step 6: Locate Snappi. Hook one end of Snappi into Tinkle Trap at baby's hip.

Step 7: Pull Snappi across Baby's belly and hook on other side.

Step 8: Pull Snappi down to form a "Y" shape.

Step 9: Party with the assistant.

***SAFETY NOTE! Snappis are an amazing invention that make cloth diapering a wiggly baby so much easier for new cloth diapering parents. Please be sure to cover your Snappi'ed diaper with a secure cover. Those little hooks can hurt!***
Mom! Let's put this one on her!

Oh...you listened? Sorry, I lost interest.

If you are like me and embrace the hip puddle, you can pin a Tinkle Trap to go coverless around the house. Kellie has volunteered to model her Tinkle Traps.
Trimmed rise, wings inside

Full rise, wings outside

Full Rise, wings inside

Full rise, Snappi'ed, wings inside

Full rise, Snappi'ed, wings outside
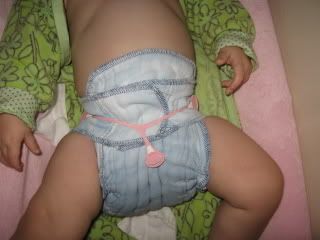
Trimmed rise, altered Snappi (I cut off the bottom hook), wings outside
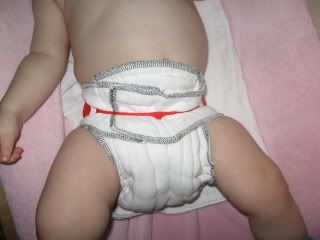
Full rise, wings outside, length folded in
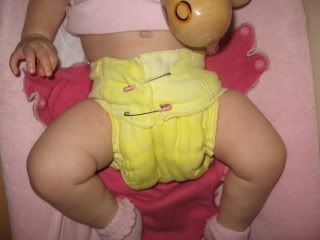
Who doesn't love a Tinkle Trap??
ETA: This photo from DiaperPin User MaMaMaMaMaMa!
Snappi in the back

Here to demonstrate is our dolly Meaghan. And my assistant Kellie will be pointing out the important parts to remember.
Step 1: Locate a Tinkle Trap and a Snappi

Step 2: Lay baby in Tinkle Trap

Step 3: Pull up the front.
 ]
]Step 4: Pull one wing snug across baby's belly.

Step 5: Pull other wing snug across baby's belly. Hold secure with hand.

Step 6: Locate Snappi. Hook one end of Snappi into Tinkle Trap at baby's hip.

Step 7: Pull Snappi across Baby's belly and hook on other side.

Step 8: Pull Snappi down to form a "Y" shape.

Step 9: Party with the assistant.

***SAFETY NOTE! Snappis are an amazing invention that make cloth diapering a wiggly baby so much easier for new cloth diapering parents. Please be sure to cover your Snappi'ed diaper with a secure cover. Those little hooks can hurt!***
Mom! Let's put this one on her!

Oh...you listened? Sorry, I lost interest.

If you are like me and embrace the hip puddle, you can pin a Tinkle Trap to go coverless around the house. Kellie has volunteered to model her Tinkle Traps.
Trimmed rise, wings inside

Full rise, wings outside

Full Rise, wings inside

Full rise, Snappi'ed, wings inside

Full rise, Snappi'ed, wings outside

Trimmed rise, altered Snappi (I cut off the bottom hook), wings outside

Full rise, wings outside, length folded in

Who doesn't love a Tinkle Trap??
ETA: This photo from DiaperPin User MaMaMaMaMaMa!
Snappi in the back


2 Comments:
At 7:30 PM, Anonymous said…
Wow, your assistant is amazing! Where did you find her? (Seriously, she's getting SO BIG I can't even stand it!)
At 8:23 PM, Anonymous said…
me, me! i love tinkle traps! but karis is obviously much bigger than your doll and kellie. i have untrimmed premiums, and the wings barely go around her waist. yikes!
Post a Comment
<< Home