How To Lanolize Wool...Without Lanolin Spots!
How do you know if your cover needs lanolizing?
When you wash it, press it into the water. Look for the following signs:
If wool sits on top of the water and has little pools of water gathering on top - it does not need lanolizing.
If wool sits on top of the water and has some pools and some areas that absorbed water without assistance - it could use a good lanolizing soon.
If wool sinks and saturates completely - it is time to lanolize.
Now here's how to lanolize without those pesky lanolin spots. I've been very thorough, so there are quite a few pictures. Have fun!
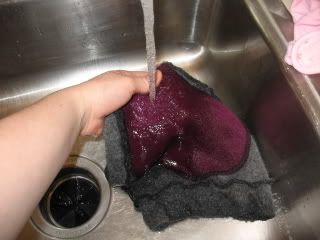
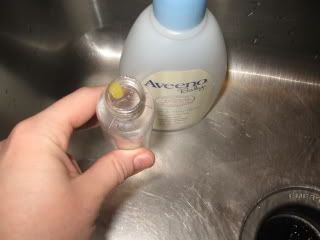
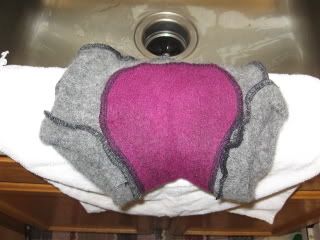
Step 1: Locate wool and wash. I'll be using Aveeno baby wash because Kellie has sensitive skin and I know this doesn't bother her. We avoid any excess scents if possible. Wool-specific wash is available. But when this works, why pay extra?
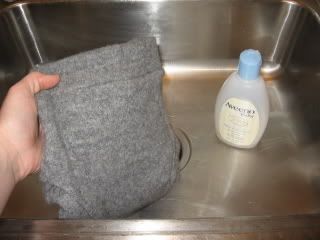
Step 2: Fill the sink with tepid water. Test with wrist.

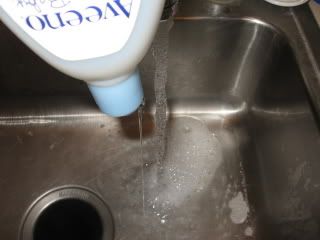
Step 3: Add baby wash.
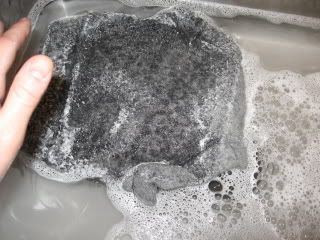
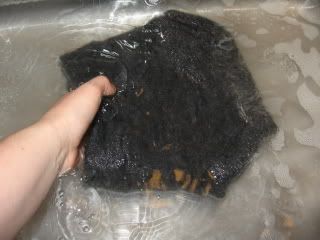
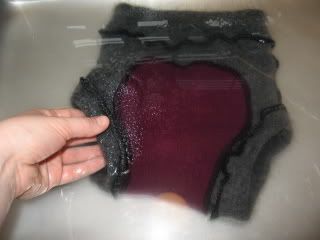
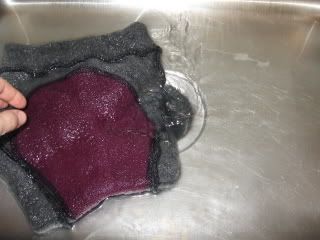
Step 4: Add wool. Notice my wool soaked up water over it's entire body. This cover has never been lanolized.
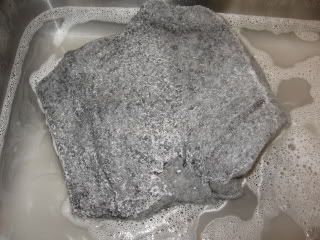
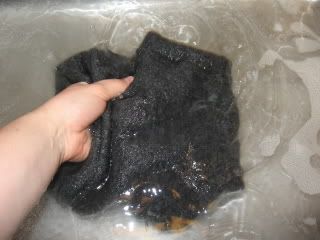
Step 5: Swish wool around a bit. Make some bubbles.
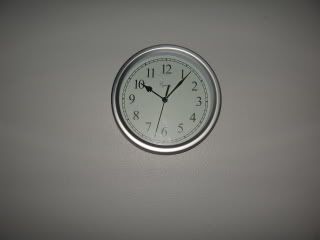
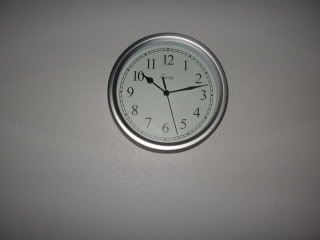
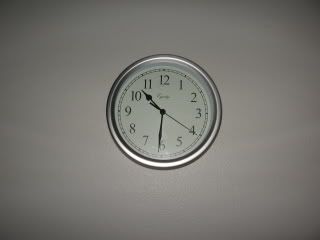
Step 6: Check the clock. Let wool sit for five minutes.
In that five minutes you could:
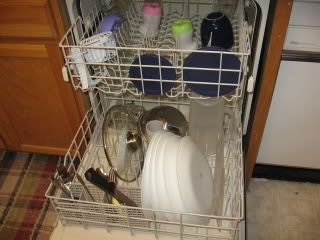
Unload the dishwasher.
Make a pot of coffee.

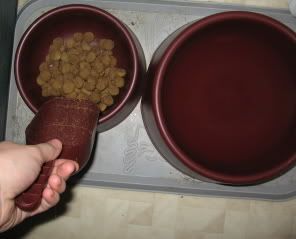
Feed the dog.
Ding! Five minutes are up. Go back to your wool.
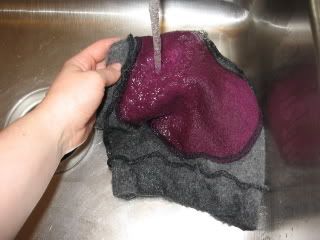
Step 8: Swish it around a bit more.

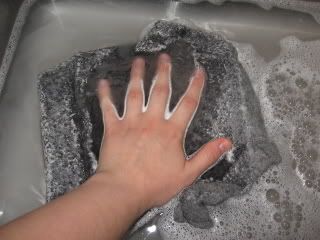
Step 9: Massage gently. Using both hands. Hey, someone has to hold the camera!

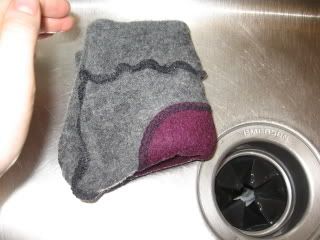
Step 10: Turn wool inside out.
Step 11: Rinse thoroughly in tepid water.
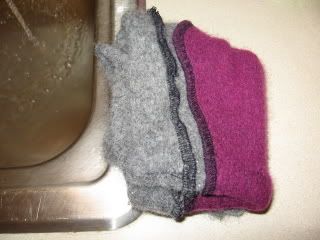
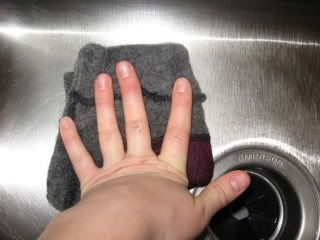
Step 12: Squeeze out excess water. Set aside.
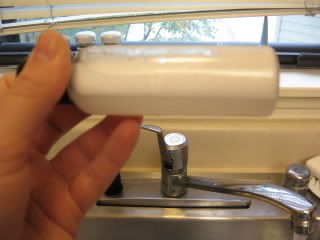
Step 13: Locate your wool wash, your lanolin, and your mixing container with lid. I'm using regular solid lanolin purchased from a local retailer. Liquid lanolin will work, also. But this stuff is cheaper and it lasts longer. Remember, we're cloth diapering to save money.
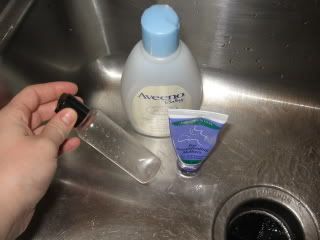
Step 14: Add a pea-sized drop of lanolin to your mixing container.
Step 15: Add a pea-sized drop of wool wash to your container.
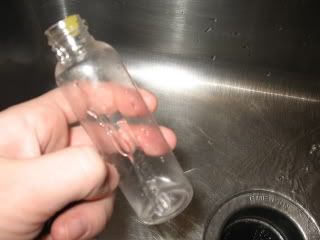
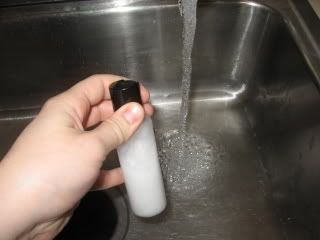
Step 16: Fill halfway with HOT water. As hot as your tap will go.

Step 17: Shake like mad until everything mixes into a nice creamy colored liquid.
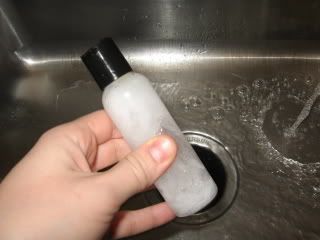
Step 18: Fill sink with tepid water. Continue shaking like mad.
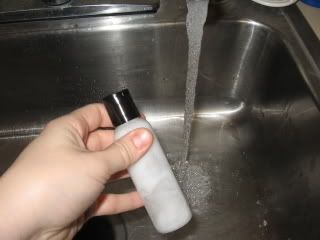

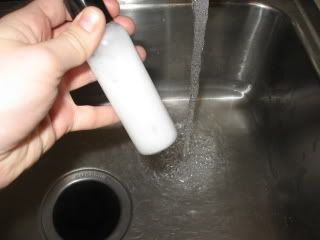
Step 19: Check for nice creamy mixture. No blobs of lanolin left.
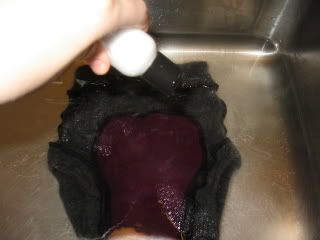
Step 20: Put wool into sink full of tepid water.

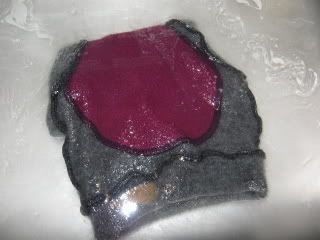
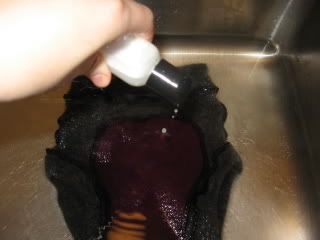
Step 21: Add lanolin mixture a little bit at a time. My container has a squeeze top. If you're using a baby food jar or a tupperware, just try not to add it all in one spot.

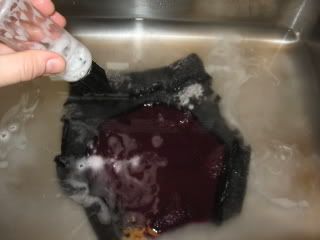
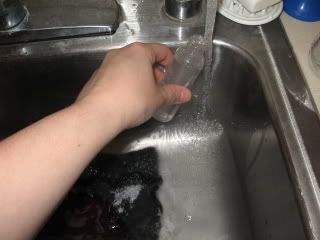
Step 22: Rinse container with tepid water. Pour water into sink with the rest of the lanolin. Every bit counts!
All gone!

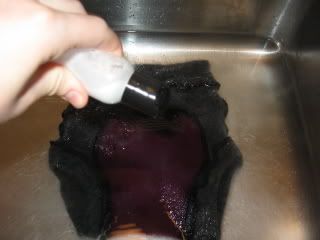
Step 23: Swish around your wool a bit. Turn wool over.

Step 24: Let wool sit for five to ten minutes. I chose five because I know Kellie is due to wake up from her nap any minute. If you have ten minutes, go for it.

In that five minutes you could:
Enjoy the cup of coffee you brewed earlier.
Make the dog move out of your chair so you can 'Pin.

Check your posts.
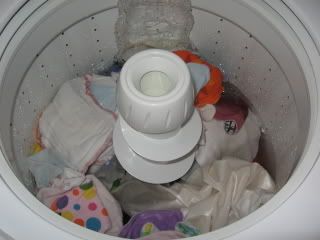
Start a load of diaper laundry.
Ding! Five minutes are up!
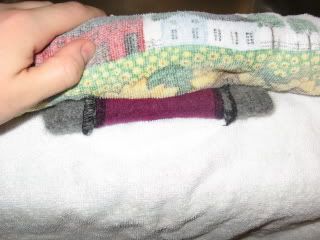
Step 27: Drain the water. Hold onto wool so it doesn't fall into your disposal. Believe me. It happens.
Step 28: Fold wool.
Step 29: Squeeze out excess water.
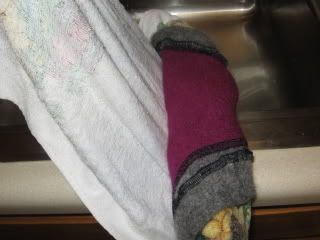
Step 30: Lay wool on towel.
Step 31: Roll it up and squeeze out excess water. It's amazing how much wool can absorb, isn't it??

Step 31: Unroll.
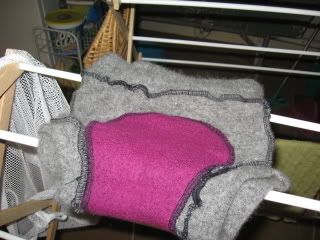
Step 30: Relocate wool to a drying rack or some other well-ventilated area to dry. The drying process can take up to 48 hours. Good thing I didn't take pictures of that, right?
And you're done! You lanolized your wool and didn't get a single lanolin spot! Give yourself a pat on the back. I'm off to get Kellie. She'll be hungry by now.
When you wash it, press it into the water. Look for the following signs:
If wool sits on top of the water and has little pools of water gathering on top - it does not need lanolizing.
If wool sits on top of the water and has some pools and some areas that absorbed water without assistance - it could use a good lanolizing soon.
If wool sinks and saturates completely - it is time to lanolize.
Now here's how to lanolize without those pesky lanolin spots. I've been very thorough, so there are quite a few pictures. Have fun!
Step 1: Locate wool and wash. I'll be using Aveeno baby wash because Kellie has sensitive skin and I know this doesn't bother her. We avoid any excess scents if possible. Wool-specific wash is available. But when this works, why pay extra?
Step 2: Fill the sink with tepid water. Test with wrist.
Step 3: Add baby wash.
Step 4: Add wool. Notice my wool soaked up water over it's entire body. This cover has never been lanolized.
Step 5: Swish wool around a bit. Make some bubbles.
Step 6: Check the clock. Let wool sit for five minutes.
In that five minutes you could:
Unload the dishwasher.
Make a pot of coffee.
Feed the dog.
Ding! Five minutes are up. Go back to your wool.
Step 8: Swish it around a bit more.
Step 9: Massage gently. Using both hands. Hey, someone has to hold the camera!
Step 10: Turn wool inside out.
Step 11: Rinse thoroughly in tepid water.
Step 12: Squeeze out excess water. Set aside.
Step 13: Locate your wool wash, your lanolin, and your mixing container with lid. I'm using regular solid lanolin purchased from a local retailer. Liquid lanolin will work, also. But this stuff is cheaper and it lasts longer. Remember, we're cloth diapering to save money.
Step 14: Add a pea-sized drop of lanolin to your mixing container.
Step 15: Add a pea-sized drop of wool wash to your container.
Step 16: Fill halfway with HOT water. As hot as your tap will go.
Step 17: Shake like mad until everything mixes into a nice creamy colored liquid.
Step 18: Fill sink with tepid water. Continue shaking like mad.
Step 19: Check for nice creamy mixture. No blobs of lanolin left.
Step 20: Put wool into sink full of tepid water.
Step 21: Add lanolin mixture a little bit at a time. My container has a squeeze top. If you're using a baby food jar or a tupperware, just try not to add it all in one spot.
Step 22: Rinse container with tepid water. Pour water into sink with the rest of the lanolin. Every bit counts!
All gone!
Step 23: Swish around your wool a bit. Turn wool over.
Step 24: Let wool sit for five to ten minutes. I chose five because I know Kellie is due to wake up from her nap any minute. If you have ten minutes, go for it.
In that five minutes you could:
Enjoy the cup of coffee you brewed earlier.
Make the dog move out of your chair so you can 'Pin.
Check your posts.
Start a load of diaper laundry.
Ding! Five minutes are up!
Step 27: Drain the water. Hold onto wool so it doesn't fall into your disposal. Believe me. It happens.
Step 28: Fold wool.
Step 29: Squeeze out excess water.
Step 30: Lay wool on towel.
Step 31: Roll it up and squeeze out excess water. It's amazing how much wool can absorb, isn't it??
Step 31: Unroll.
Step 30: Relocate wool to a drying rack or some other well-ventilated area to dry. The drying process can take up to 48 hours. Good thing I didn't take pictures of that, right?
And you're done! You lanolized your wool and didn't get a single lanolin spot! Give yourself a pat on the back. I'm off to get Kellie. She'll be hungry by now.
posted by CrunchyChick @ 11:18 AM
![]()


46 Comments:
At 6:26 AM, MartaMolly said…
Wow Woman! You have been busy indeed!
Now I know why you haven't called recently, or maybe it is my turn? sorry.
Anyway, you have become quite the little seamstress, with all that creativity bottled up in you it's a wonder that you haven't previously exploded! Great job on the info, I should be so intelligent.
Kisses and hugs to Kellie and Brian and save some for yourself.
At 7:40 AM, Anonymous said…
Truly, I love you and your how-to posts! (Post another video of Kellie Angel!)
At 11:04 AM, Anonymous said…
I saw this guide on DS so I saved it! This is great!
Thanks from a newbie CD'er and wool user!
At 9:19 PM, Lissa said…
ty ty ty, I was looking for something just like this and someone on DS linked me:) TY!!-Lissa
At 4:59 PM, CrunchyChick said…
Awww! You MaMas are very welcome. Please spread the word! It took me nearly six months to figure out that lanolizing doesn't have to be a big production. Keep it simple! :)
At 4:40 PM, allthingspurple said…
wow, BusyMaMa. I am glad i saw the thread in PIN leading to your post. I am new to PIN and I have just gotten myself 2 wool covers and have no idea how to lanolize it. This is a godsend. Thanks !!
At 5:20 PM, Corso Family said…
Bookmarking this!!! Thanks!
At 10:30 AM, Anonymous said…
Hi there! I'm a fellow CDing mama and I just wanted to say I loved this post, it's informative and funny. I sell wool diaper covers and I'm wondering if you wouldn't mind me putting a link to this article up? www.greenacredesigns.com
Thank you!
Shannon
At 4:54 PM, Anonymous said…
This is great. I finally got around to cleaning some of my covers and I think the days of lano spots are over!!!
At 6:39 AM, Anonymous said…
You've totally made my day. Not only have I learned how to lanolize properly I've had a good laugh in the process. I love yiur tutorials!
At 10:46 PM, Anonymous said…
This is a great tutorial I loved it thanks so much for the help.
At 9:35 AM, Sarah said…
She cloth diapers, instructs others on the care of wool, is super-mom, major multi-tasker, gets more done in 25 minutes than I get done in one entire day, takes pictures while doing so, posts pictures and blogs, AND is hilarious while doing so!! :) I want to be you for one day, it's not too much to ask, is it?? :)
At 7:53 PM, jess c. said…
thanks so much for this entertaining tutorial!
At 9:17 AM, Anonymous said…
What a visual treat. Thanks for the work you put into this. I wonder if readers have other suggestions for uses for lanolin. My son is well past diapering, and other than applying topically to skin, I don't know how to use my 3 oz of liquid lanolin. Thanks
At 10:57 AM, Misty said…
Hi, I've been CD'ing for awhile, but BRAND new to wool. What kind of wool wash do you buy? Where do you get it. Thanks for the pictures!!
At 6:27 PM, Martha said…
I'm a retired Home Ec Teacher. Your demo was wonderful
At 1:17 PM, Anonymous said…
This is soooo helpful! *THANK YOU!* (((((HUGS))))) sandi
At 6:25 AM, Centro la Milpa said…
Thank you for this tutorial, I am including it in my blog, because I'm trying to get all these information in Spanish, for more people to know.
At 4:22 AM, Maria said…
Thank you for the directions - they really work!! Can I ask you where you got your wool cover - it looks so well-made and nice colours!
At 8:19 AM, Hannah said…
SOOO helpful!!! Thank you thank you thank you!!!
At 3:49 PM, Joy said…
WOW!!! Your tutorial was suggested to me on diaperswappers and I'm so glad!!! I might actully be able to USE that awesome pair of longies!! *grin*
THANKS!!!
Joy
At 8:26 AM, Kari_lynn222 said…
This was very informative and entertaining at the same time! Thanks so much!! :)
At 5:34 PM, Jessica said…
Thanks so much for this tutorial, I was a little worried to dabble in the world of wool until I saw how easy it is to wash and lanolize on this tutorial. I followed your steps today with my first 2 wool covers and they seem like they'll be pretty bulletproof! Just waiting on them to dry, thanks again!
At 7:29 PM, geetabean said…
I am new to cloth diapering and just used your tutorial to lanolize my wool covers and soakers! Very easy to follow, clear directions and it was super easy! Thank you so much for posting this....it makes the whole process really easy for newbies like me!
At 6:26 PM, Beth Terry, aka Fake Plastic Fish said…
Funniest post ever! I have never lanolized wool in my life and only found your site because someone on Etsy mentioned lanolizing wool and I wanted to know what that meant. Good old Google to the rescue. Thanks for making me laugh out loud. You have inspired me to use more humor on my own blog, Fake Plastic Fish (http://fakeplasticfish.com), which is all about living life with less plastic.
Cheers!
At 7:27 PM, Heather said…
I've lanolized my wool cover before, but I really liked your tutorial. Helped me to know when I need to lanolize!
At 4:11 PM, Amy said…
Thanks for this. I have 2 covers to lanolize, but have been putting it off. Every time I had lonolized in the past I would get those spots, but now I won't. I'll be lonolizing them tomorrow and will be checking out thrift stores for sweaters to make wool covers now that I see it doesn't have to be time consuming and a pain!
At 7:37 AM, Anonymous said…
Where did you get your lanolin?
At 7:39 AM, AMDR said…
Would this work for a large long furry wool mat? Like an ECing blanket or mat? I'm new to this and very unsure!!
At 8:21 AM, Anonymous said…
I got my lanolin at Walmart - in the bottle section.
And yes, this would work for larger pieces of wool. :)
At 5:05 AM, Heather said…
Such great info on lanolizing. Did you make the soaker? If you did what pattern did you use and where did you buy the fabric?
Thanks,
Heather
At 11:40 AM, Anonymous said…
Thank you! This is a great! And I loved your sense of humour! :)
At 5:40 PM, Anonymous said…
thank you mama, love it!!!
At 9:42 AM, slickguy1 said…
Hey there Laura! I'd love to leave a link on our site about this article - www.naturebumz.com :) Might we be able to use a picture to link it with? Hope to chat soon -
Crystal Cline
ccline@naturebumz.com :)
At 7:04 PM, Crunchy Chick said…
Hi mamas!
I've kind of left this blog in the dust - but just wanted to answer a few questions.
Q: Am I allowed to link this on my blog/site/email?
A: SURE! Link away :D
Q: Did you make the soaker?
A: I did! Using Katrina's free soaker pattern on diaperswappers.com
Q: Out of what material did you make the soaker?
A: A wool sweater purchased from Salvation Army.
Q: Can I be you for a day?
A: Sure - if you wouldn't mind folding the four shameful baskets of laundry on my loveseat. I think that is a fair trade. 8)
Peace and love! Laura
At 4:44 PM, Megan and Joshua Bailly said…
I just linked to you because you're pretty much amazing. I love this tutorial and am just about to take my own adventure in wool and really appreciate your help! Check my blog out! http://clothdiaperingdiva.blogspot.com/
At 2:40 AM, Anonymous said…
Now I can confidently relanolize a jumper.
Thank you C.C.
At 7:51 PM, Anonymous said…
Thank you so much. I have been searching for the perfect instructions and here they are. I was going to write my own blog but how could I top this? I am going to link to this from my facebook page. Eco Parents Australia.
At 8:49 AM, Anonymous said…
Thank you. Can I have your dog?
At 5:55 PM, Jeanine said…
I love people like you.
At 7:25 PM, Anonymous said…
Thanks so much for this!
At 8:09 AM, Cannabis Pullover said…
Make a pot of coffee. Photo Sharing and Video Hosting at ... qcannabis.blogspot.de
At 5:51 AM, Magpie said…
I haven't lanolized in... 7? Years since my daughter potty trained, but my husband was complaining his Shetland sweater wasn't as waterproof as it used to be. Thanks for the refresher! Now to see if the huge thing will fit in the sink...
At 5:52 AM, Magpie said…
I haven't lanolized in... 7? Years since my daughter potty trained, but my husband was complaining his Shetland sweater wasn't as waterproof as it used to be. Thanks for the refresher! Now to see if the huge thing will fit in the sink...
At 8:01 AM, Ed Stewart said…
Glad to read the last post. I have an Aran sweater knitted for me on Aran over 40 years ago - for many years you could feel the lanolin (and smell the sheep) with the rain beading up on it but no longer. The sweater is a natural grey from the wool of a black sheep - wonder in this case whether I even have to be concerned about the lanolin spotting?
At 8:49 AM, Unknown said…
Thank you! I was just looking around to see if re-lanolin-izing was a thing, and I love your pictures and "rhythm." :)
Post a Comment
<< Home